Introduction
This tutorial will help you to create a Document Library and enable Metadata Navigation Filtering with custom columns.
It will all be done with Visual Studio, a Feature and an Event Receiver.
You will need Visual Studio 2013/2015 and SharePoint 2013.
Download the project here.
1. Visual Studio Solution
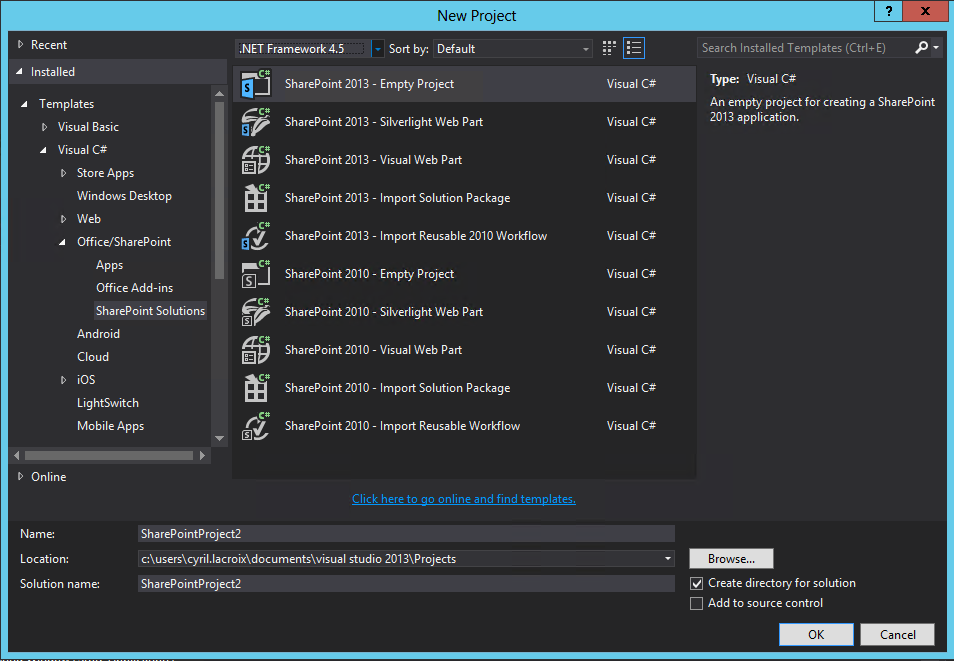
Create a new SharePoint 2013 – Empty Project.
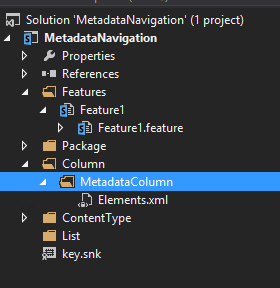
You can organize your project as follow:
Add 3 folders:
-Column
-ContentType
-List
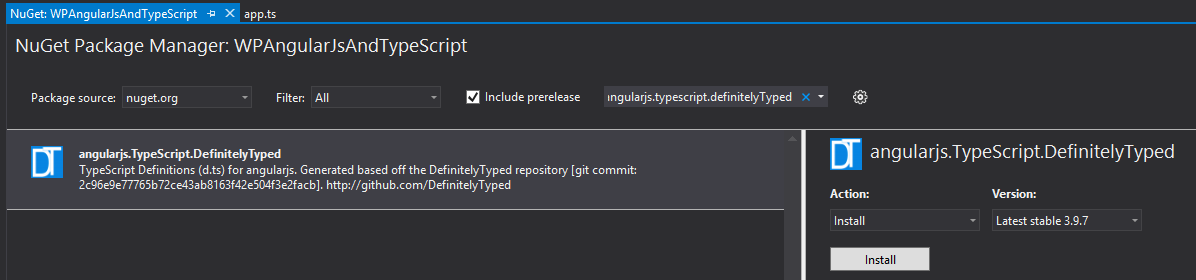
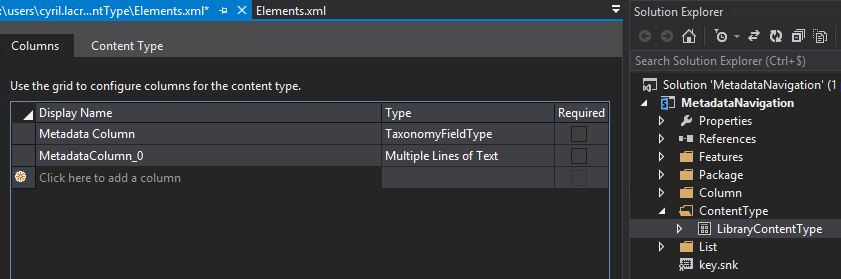
Add a new Site Column in the Column folder.
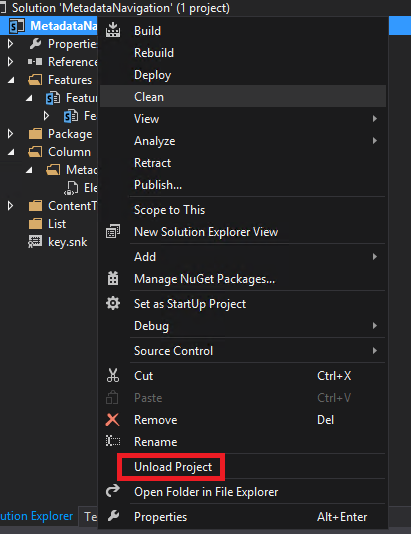
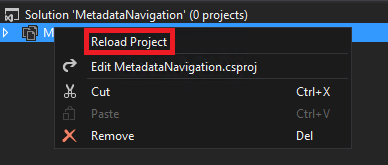
If the Site Column didn’t load correctly (like in the picture above), just save everything unload the project and reload it.
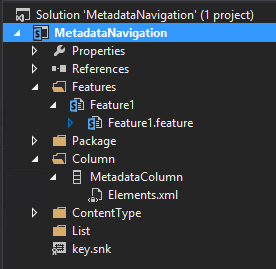
Then you should see the Site Column with the icon like below.
Double click on your column to edit it.
To use this column as Taxonomy Field you must add an hidden note field inside and linked it to the column.
So don’t forget to put the GUID in the customization part of your column.
This hidden note field will be used to store the text that the user will type for filtering, it’s really important for the Key Filter.
For this new hidden note field you need to generate a new Guid you can use the Visual Studio tool for that called guidgen.exe
You can find it in Visual Studio in the top bar menu click Tools, Create GUID.

Or you can find this tool here: C:\Program Files (x86)\Microsoft Visual Studio 12.0\Common7\Tools\guidgen.exe
In the window select Registry Format then click New GUID and finally Copy.
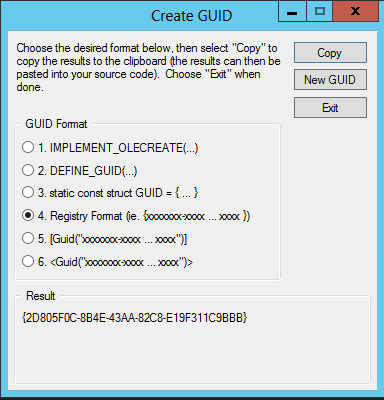
You can use the Guid like that (upper case works just fine)
For the new field do as follow (standard SharePoint naming for Taxonomy hidden field):
Name = ColumnNameTaxHTField0
DisplayName= ColumnName_0
StaticName = ColumnNameTaxHTField0
<?xml version="1.0" encoding="utf-8"?>
<Elements xmlns="http://schemas.microsoft.com/sharepoint/">
<Field ID="{BFD4F83B-F5A3-4E7D-A96E-1E6C64D23798}"
Name="MetadataColumnTaxHTField0"
DisplayName="MetadataColumn_0"
StaticName="MetadataColumnTaxHTField0"
Type="Note"
ShowInViewForms="FALSE"
Required="FALSE"
Hidden="TRUE"
CanToggleHidden="TRUE"
RowOrdinal="0"
Group="- Custom Group"/>
<Field ID="{dd644310-71d0-4f7b-983a-8e092c1cbc73}"
Name="MetadataColumn"
DisplayName="Metadata Column"
StaticName="MetadataColumn"
ShowField="Term1033"
Type="TaxonomyFieldType"
Required="FALSE"
Group="- Custom Group">
<Customization>
<ArrayOfProperty>
<Property>
<Name>TextField</Name>
<Value xmlns:q6="http://www.w3.org/2001/XMLSchema" p4:type="q6:string" xmlns:p4="http://www.w3.org/2001/XMLSchema-instance">BFD4F83B-F5A3-4E7D-A96E-1E6C64D23798</Value>
</Property>
</ArrayOfProperty>
</Customization>
</Field>
</Elements>
2. Content Type
Add a new Content Type in the ContentType folder.
Double click on it to edit it and add both fields that you just created.
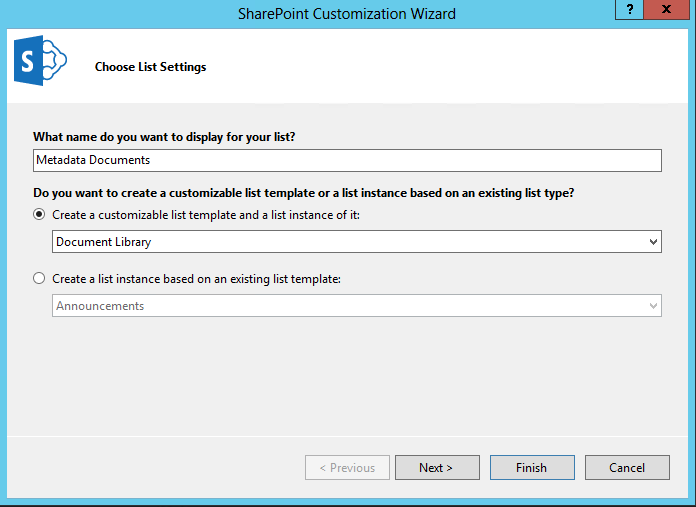
3. List
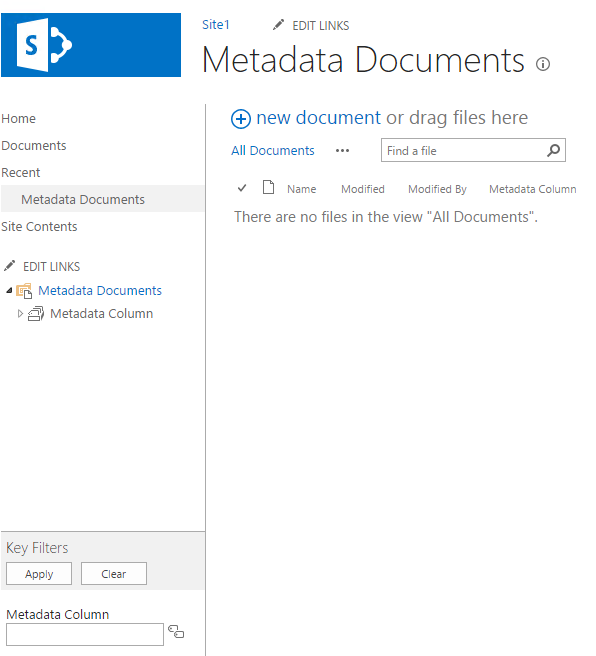
Add a new Document Library to the list folder, you can also do this with a List.
Double click on it to edit it and add both fields.
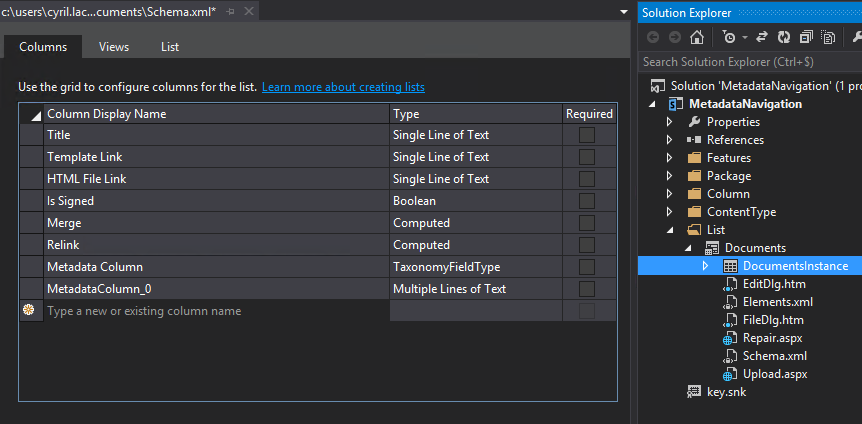
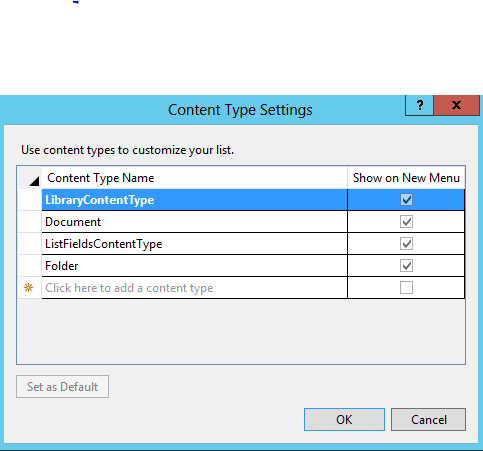
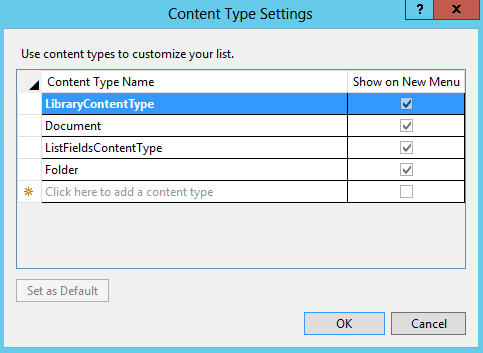
Click on Content Type.

Add your content type and set it as default.
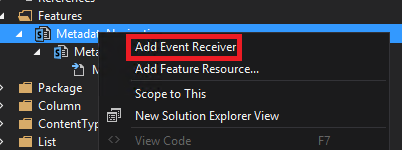
4. Event Receiver
Rename your feature and add a new Event Receiver by right clicking on it.
Open the Event Receiver C# file.
Uncomment the FeatureActivated method and put a try / catch inside and remove the throw in the catch.
Add the following variables and change the value if needed.
try
{
SPContext context = SPContext.Current;
Guid managedMetadataFeatureId = new Guid("7201d6a4-a5d3-49a1-8c19-19c4bac6e668");
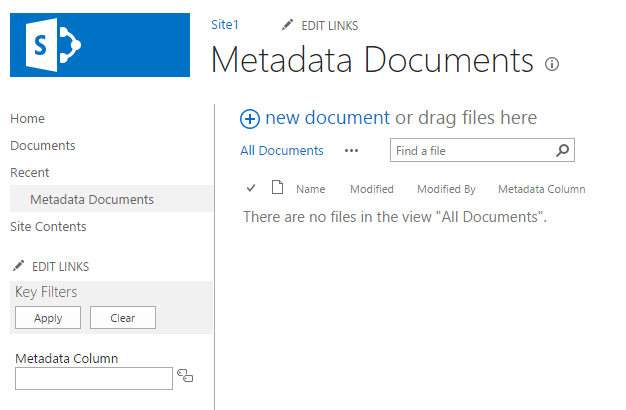
string listName = "Metadata Documents";
string fieldName = "Metadata Column";
string termStoreName = "Managed Metadata Service";
string groupName = "Group1";
string termSetName = "TermSet";
}
catch(Exception)
{
}
Enable the Metadata Navigation and Filtering feature on the site.
Below the last variable and inside the try / catch add the following code:
 //Activate Metadata Navigation and Filtering feature if it's not already activated
 if (context.Web.Features[managedMetadataFeatureId] == null)
 context.Web.Features.Add(managedMetadataFeatureId);
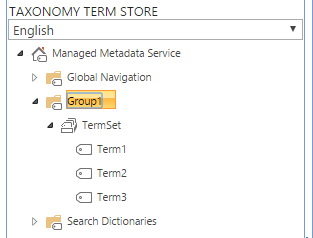
Open your Cental Admin go to Application Management then Manage Service Application then click on the link below your Managed Metadata Service to open it.
Use the SharePoint interface to create and add a new Group, a new TermSet and some Terms. You can also use existing terms.
Add the Microsoft.SharePoint.Taxonomy dll to your project references. You can find it here C:\Program Files\Common Files\microsoft shared\Web Server Extensions\15\ISAPI
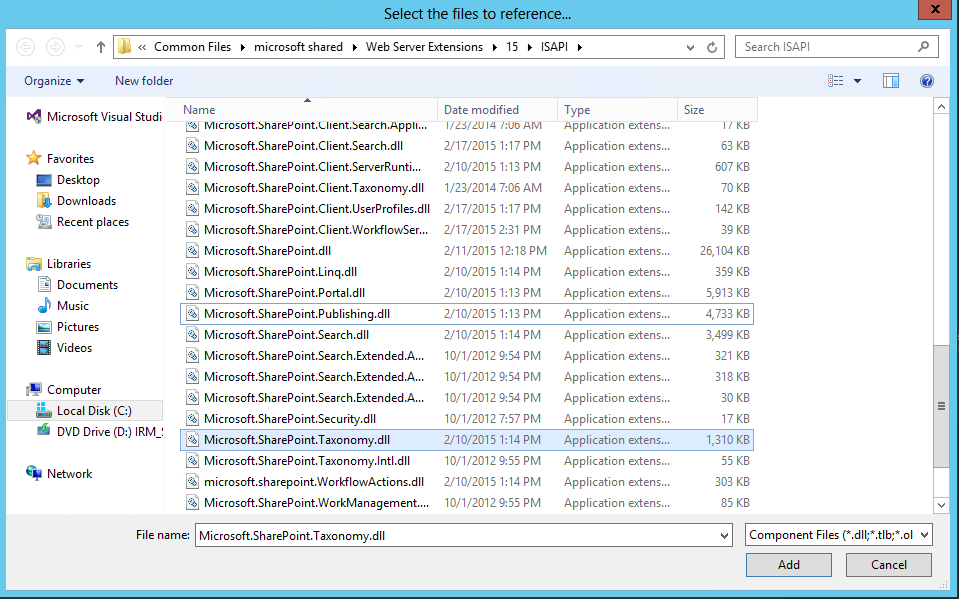
To associate your column with the terms add the following code below the feature activation:
  //Associate TermSet with the Column

 //Connect to the TermStore
 TaxonomySession session = new TaxonomySession(context.Site);

 TermStore termStore = session.TermStores[termStoreName];
 Group group = termStore.Groups[groupName];
 TermSet termSet = group.TermSets[termSetName];

 //Get the field
 SPList list = context.Web.Lists[listName];
 TaxonomyField field = list.Fields.GetField(fieldName) as TaxonomyField;

 field.SspId = termSet.TermStore.Id;
 field.TermSetId = termSet.Id;
 field.TargetTemplate = string.Empty;
 field.AllowMultipleValues = true;
 field.CreateValuesInEditForm = true;
 field.Open = true;
 field.AnchorId = Guid.Empty;

 field.Update();
 termStore.CommitAll();
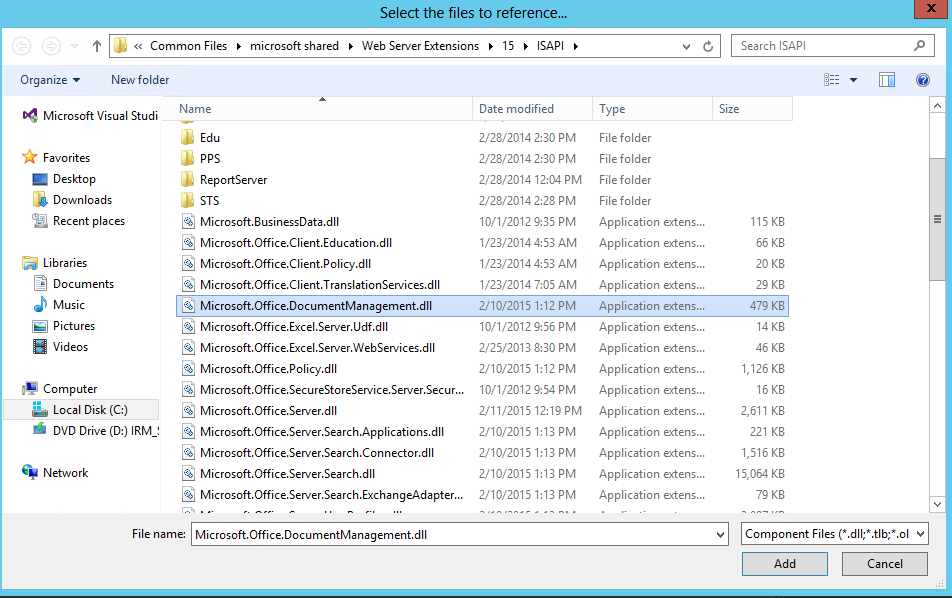
Add the Microsoft.Office.DocumentManagement.MetadataNavigation dll to your project references.
You can find it here C:\Program Files\Common Files\microsoft shared\Web Server Extensions\15\ISAPI
 Set your column as Hiearchy and KeyFilters.
 //Set Column as Metadata Navigation
 field = list.Fields[fieldName] as TaxonomyField;
 MetadataNavigationSettings navSettings = MetadataNavigationSettings.GetMetadataNavigationSettings(list);
 navSettings.ClearConfiguredHierarchies();
 navSettings.ClearConfiguredKeyFilters();

 //Hierarchy
 navSettings.AddConfiguredHierarchy(new MetadataNavigationHierarchy(field));


 //Key Filter
 navSettings.AddConfiguredKeyFilter(new MetadataNavigationKeyFilter(field));

 MetadataNavigationSettings.SetMetadataNavigationSettings(list, navSettings);
 list.RootFolder.Update();
 list.Update();
For some reason if I just put one column inside the Hierachy SharePoint will not display the Hierarchy menu on the library.
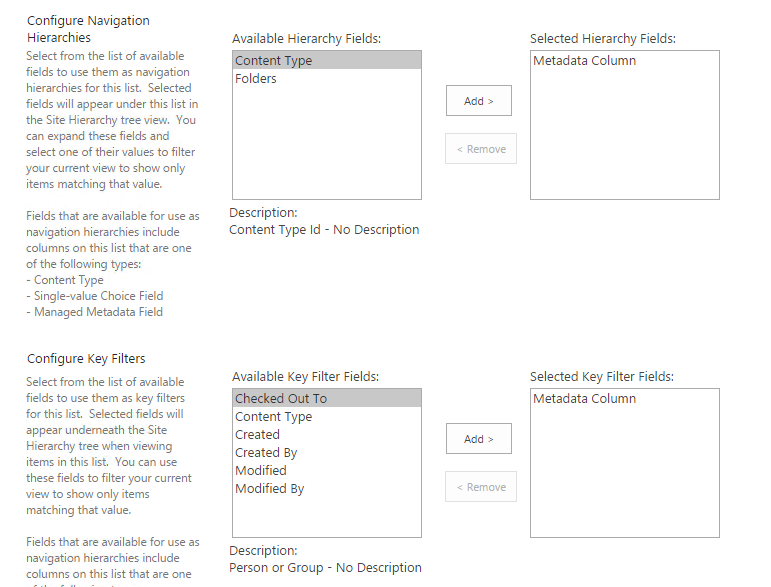
If I create 2 customs columns and add them to the Hierarchy it works or if I don’t clear the Hiearachy and keep the Folder column inside it will work.
You can also manually open the Metadata Navigation Settings in the Library Settings and just click Ok and it will also work.
For now I don’t have any solution about that… I you have one let me know 🙂
Also to have the Key Filter to display you must create the hidden note field that will hold the user filter as in my example above.
Download the project here.
Whole EventReceiver:
using System;
using System.Runtime.InteropServices;
using System.Security.Permissions;
using Microsoft.SharePoint;
using Microsoft.SharePoint.Taxonomy;
using Microsoft.Office.DocumentManagement.MetadataNavigation;

namespace MetadataNavigation.Features.MetadataNavigation
{
 ///

<summary>
 /// This class handles events raised during feature activation, deactivation, installation, uninstallation, and upgrade.
 /// </summary>


 /// <remarks>
 /// The GUID attached to this class may be used during packaging and should not be modified.
 /// </remarks>

 [Guid("46d87123-94d2-4bfe-8bc9-e2a84219e4fa")]
 public class MetadataNavigationEventReceiver : SPFeatureReceiver
 {
 // Uncomment the method below to handle the event raised after a feature has been activated.

 public override void FeatureActivated(SPFeatureReceiverProperties properties)
 {

 try
 {
 SPContext context = SPContext.Current;

 Guid managedMetadataFeatureId = new Guid("7201d6a4-a5d3-49a1-8c19-19c4bac6e668");
 string listName = "Metadata Documents";
 string fieldName = "MColumn2";
 string termStoreName = "Managed Metadata Service";
 string groupName = "Group1";
 string termSetName = "TermSet";

 //Activate Metadata Navigation and Filtering feature
 if (context.Web.Features[managedMetadataFeatureId] == null)
 context.Web.Features.Add(managedMetadataFeatureId);

 //Associate TermSet with the Column

 //Connect to the TermStore
 TaxonomySession session = new TaxonomySession(context.Site);

 TermStore termStore = session.TermStores[termStoreName];
 Group group = termStore.Groups[groupName];
 TermSet termSet = group.TermSets[termSetName];

 //Get the field
 SPList list = context.Web.Lists[listName];
 TaxonomyField field = list.Fields.GetField(fieldName) as TaxonomyField;

 field.SspId = termSet.TermStore.Id;
 field.TermSetId = termSet.Id;
 field.TargetTemplate = string.Empty;
 field.AllowMultipleValues = true;
 field.CreateValuesInEditForm = true;
 field.Open = true;
 field.AnchorId = Guid.Empty;

 field.Update();
 termStore.CommitAll();

 //Set Column as Metadata Navigation
 field = list.Fields[fieldName] as TaxonomyField;
 MetadataNavigationSettings navSettings = MetadataNavigationSettings.GetMetadataNavigationSettings(list);
 navSettings.ClearConfiguredHierarchies();
 navSettings.ClearConfiguredKeyFilters();

 //Hierarchy
 navSettings.AddConfiguredHierarchy(new MetadataNavigationHierarchy(field));


 //Key Filter
 navSettings.AddConfiguredKeyFilter(new MetadataNavigationKeyFilter(field));

 MetadataNavigationSettings.SetMetadataNavigationSettings(list, navSettings);
 list.RootFolder.Update();
 list.Update();

 }
 catch (Exception)
 {

 }


 }


 // Uncomment the method below to handle the event raised before a feature is deactivated.

 //public override void FeatureDeactivating(SPFeatureReceiverProperties properties)
 //{
 //}


 // Uncomment the method below to handle the event raised after a feature has been installed.

 //public override void FeatureInstalled(SPFeatureReceiverProperties properties)
 //{
 //}


 // Uncomment the method below to handle the event raised before a feature is uninstalled.

 //public override void FeatureUninstalling(SPFeatureReceiverProperties properties)
 //{
 //}

 // Uncomment the method below to handle the event raised when a feature is upgrading.

 //public override void FeatureUpgrading(SPFeatureReceiverProperties properties, string upgradeActionName, System.Collections.Generic.IDictionary<string, string> parameters)
 //{
 //}
 }
}